Rimfire Practice

It was a perfect weekend here in SEPA, sunny mid 70s just a light breeze.

I managed to sneak away from my yard work for a hour or two with my rimfire A2.

20140603-210051.jpg

The high power range was crowded, due to the nice weather, but I had the rimfire range more or less to myself, which was relaxing. I had a couple of things to work on.

First I’ve been having some problems with my hand cramping/fatiguing in slow prone. I theorized I had a bit too much “downward pressure” so I brought my sling out another notch which seemed to help. Of course now I’m getting awful close to running out of sling.

20140603-210225.jpg

Second, I needed to work on off hand. While I’ll never be done practicing, I came to some interesting revelations. The High Power range must be angled up hill because my NPA is awful high. This isn’t so much a problem but explains why my position varies from range to range. Additionally, I pulled up and left, just like I did at the matches the weekend before. After reviewing the video on my GoPro it looks like I am flinching a little in anticipation, even with my 22. So some more dry fire and rimfire practice are in order.

Unrelated to practice, I enjoyed spending some time with my 22. The range was quite, shaded and peaceful. It was a nice change, I am going to try to spend some more time shooting 22.

Open a Tight Stamped Trigger Guard on A M1 Garand

World War Two Practical Match at LRGC

I went a little out of my comfort zone on this one. A friend of mine talked me in to signing up for a Garand “practical rifle” match at Langhorne Rod and Gun.

It was a sunny, unseasonably warm day in the forties, with a foot of snow still on the ground.

Several different courses of fire at different distances. All based on 8 round clips so lots of pinging.

16 rounds standing 16 round kneeling at 100 yards at steel from the top of their 100 yard berm.
16 rounds standing to kneeling at 50 yards at a reduced IDPA target
16 rounds prone at steel plates at 200 yards

20140225-201601.jpg

I did terrible, but it wasn’t really about “winning” or at least that’s what I told myself.

A couple things I need to think about from what I learned at this match. I think my 6:00 hold held me back a bit, I should keep a dope for both 6:00 and center mass. I wasn’t prepared to use hasty sling and they have a “muzzle down” rule that threw me off a bit. I’m a little ashamed to admit, I have no idea how to rig up with the barrel down without dropping my rifle.

My excuses aside it was fun, well run match. It has gotten me thinking a bit about my shooting style a bit, and perhaps I should spend some time practicing transitioning and hasty sling.

In unrelated news a fella there had a Mini-G, and I want one!

A little video of me shooting.

Remington 03-A3 Stripped Receiver

This afternoon I picked up, at my LGS, a stripped 03A3 receiver that I had ordered from AIM Surplus. I plan to build it up into a proper 03A3 that I can shoot in the Springfield matches at Camp Perry. These are recovered from drill rifles there is a little mark on the lower front of the receiver where the weld was ground off.

It looks nice and should be a good place to start. It includes no parts other than the ejector and the extractor collar. The receiver has been re-parked while the R stamped bolt appears to be original, and was still covered in cosmoline.

As I make progress I will update add to the “03A3 Build” tag.

20131030-203541.jpg

20131030-203626.jpg

20131030-204850.jpg

20131030-204906.jpg

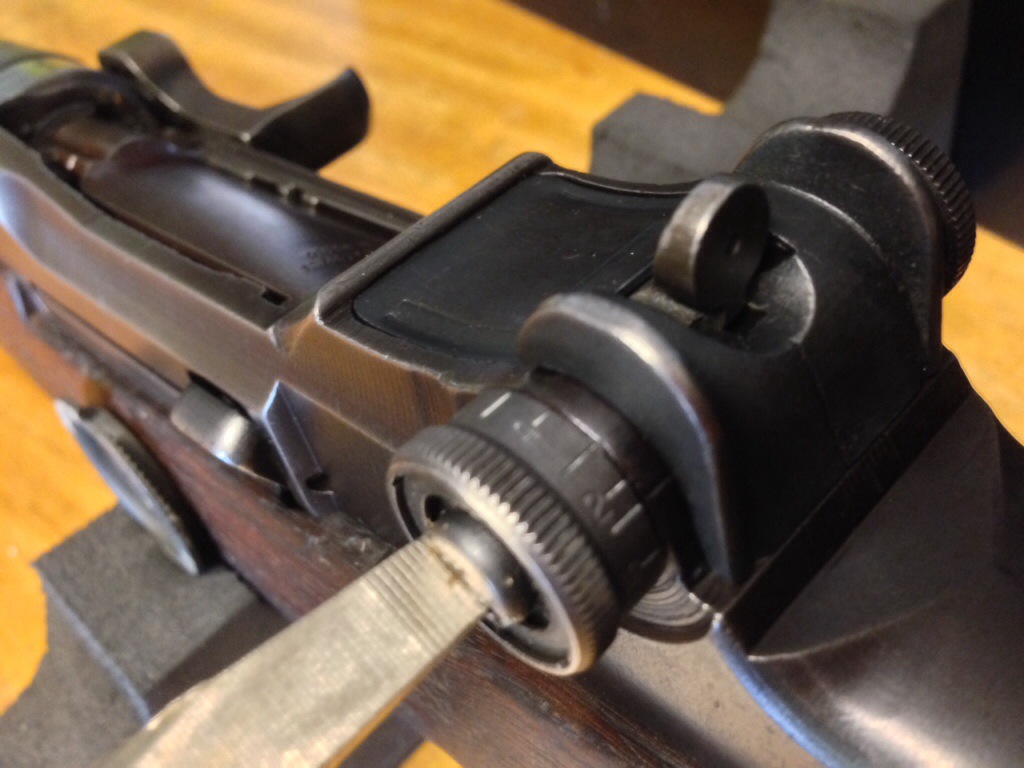
Setting The Elevation Knob On A M1 Garand

There are a few different ways to set the elevation knob on a Garand floating around. Before setting this you will first need to determine what the correct amount of clicks is for your rifle to hit the X ring.

This is how I do it:

1. Run the rear sight all the way down.
2. Loosen the elevation knob screw.
3. Continue turning the knob down until you reach your desired hashmark.
4. Continue turning the knob down counting to your desired number of clicks.
5. Tighten the elevation screw without moving the knob.
6. Turn the knob up verifying that when you have reached the number of clicks you were looking for it stops at the desired hashmark.
7. Run the rear sight all the way up and tighten the elevation knob screw all the way.
8. Return the sight to zero and go shoot in a local match.

A fair amount of competitors don’t bother with this and just count clicks. It can be a useful practice as it helps you verify at a glance you are at the right elevation. However, on the other hand, I have had the rear sight loosen up on me and cause the elevation to appear correct but the number of clicks had drifted. Best practice is probably “trust but verify” and set your your elevation knob to the right hashmark but verify from time to time, at least before each match. It is also a good idea to write your elevation and windage down on a card and place it in your stock.

20131013-210612.jpg