Springfield Armory National Historic Site

A couple weeks ago I went to visit a friend in Connecticut we took a trip up to the Springfield Armory museum. It is a decent sized two story building on the campus of a (run down) community college that was once the grounds of the armory.

The first floor is half rifles and weapons the other half is about the production methods. We spent about an hour there including a bit driving around to see the building where Garands were produced. That building is now a warehouse and business of some sort.

The second floor is the archives and is only available to tour with special permission to do research. Maybe next time Garand Thumb Blog can get a press pass.

There wasn’t a lot of people there so we spent some time talking to the ranger. One thing he pointed out was back in the day SA was like NASA i.e. government funded research to spur private development. Hence why there are so many gun manufactures in the valley, Colt, S&W, Remington, and once upon a time HRA. At least, according to him.

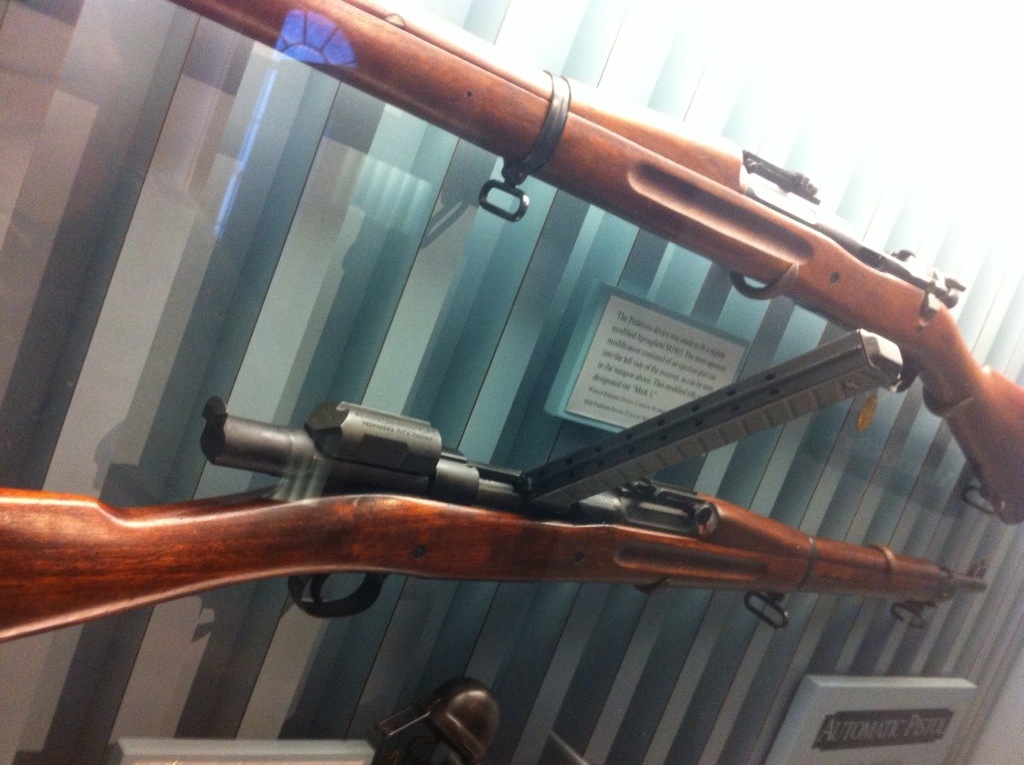
Below are some pictures from the trip.

20130511-214804.jpg

20130511-214738.jpg

20130511-214705.jpg

20130511-214642.jpg

20130511-214607.jpg

20130511-214539.jpg

20130511-214515.jpg

20130511-214444.jpg

20130511-214424.jpg

20130511-214408.jpg

20130511-214310.jpg

20130511-214241.jpg

20130511-214155.jpg

Two days of practice

It was a beautiful weekend for shooting and with my wife away I did a cut corner job of mowing the lawn and spent most of it at the range. I brought out the 1917, M1 and my new(ish) A2.

I spent some time working on the elevation for both my 1917 and Garand for both the conversion to 6 o’clock hold and to figure out why I was so low at the York match. I got that all worked out then spent some time working on my prone position, which I am now feeling much more confident in.

I practiced prone with my A2 and raised the elevation a bit so I could use 6:00 hold with this rifle too. I am very happy with it’s performance so far. I tried my hand at shooting sitting which I have literally never tried before. After trying to imitate the “crossed ankles position” I settled into some sloppy variation of it that seems to work OK for me. This has given me the courage up to sign up for the next NRA highpower match and bring my A2 in a few weeks!

Kimberton has a nice new slab for shooting prone.

20130506-222125.jpg

Think I have enough stuff?

20130506-222231.jpg

Don’t tell Bloomberg about my assault clips.

20130506-222355.jpg

Kicking Off The Season at York Riflemen

Took at trip out to York, PA for their spring match. This was my third match at York riflemen my fifth with full pits including Camp Perry last year. If feel much more confident in the pit than I had the last time I was there. This match at four full relays I shot in relay one and then pulled for the rest of the match. It was in the high 60s, sunny and calm the perfect day for shooting. Everything move very smoothly they run a great match.

I found my “scoring cheat sheet” which is just a print out of the scoring indicator positions(below) taped to my clipboard to be very handy is match as I couldn’t read the numbers by the indicator with my scope. I would strongly recommend anyone who’s memory is as poor as mine to print this out and keep it handy.

20130501-181419.jpg

As far as the match itself I made the mistake of passing on my last 2 sighters and it turned out my elevation wasn’t nearly where it should and I struggled to hold over to compensate. I should have known better. Per normal I did fairly well in rapid prone, after I brought the rear sight up. I’m going to spend some extra time practicing this weekend.

Here are some pictures from the match.

20130501-181733.jpg

20130501-181936.jpg

Have gun will travel

20130506-221045.jpg

Switching to 6 o’clock hold

After years of insisting “point of aim” is a more realistic and therefore better way to aim I am converting to “6 o’clock.”

If you are not familiar with the different sight pictures CMP has a very detailed article with pictures and everything here: http://www.odcmp.org/0907/USAMU_SightPicture.asp

The short explanation is for point of aim you put the top of the post at the center of the black. For 6 o’clock you put the top of the sight post at the bottom of the black, like a “pumpkin on a post.”

I switched for constancy and my worsening vision. Too often I have been struggling to see how much black is at the top of my sight post. Hopefully this will help me get the same picture every time.

I have also made some bold changes to my prone position at the end of last season. I’ve been fighting with cheek weld and “muscling” the rifle in prone. Instead of keeping my hand all the way out against the sling swivel I have pulled it in to where the stock curves down to the mag plate. This allows me keep the rifle a bit higher which fixes my cheek weld. I also get better skeletal support and strain less to stay on target. This should give me a better natural point of aim, more constancy and hopefully better scores.

Four Months to Camp Perry!

Registration is open for CMP week at Camp Perry. My wife has challenged me to practice once a week until then. Took the Garand out this weekend, it felt good to get back in the sling.

20130410-160304.jpg