L.E. Wilson Case Trimmer Review

I’ve been through a couple of trimmers over the years, a RCBS trim pro and a WFT. Around a year a go I also picked up a L.E. Wilson case trimmer.

20131017-195645.jpg

Both the RCBS and the WFT have pros and cons, and have their place. I did a review of the WFT here..

The Wilson trimmer is unique in that it has different cartridge specific case holders. As opposed to the shell holders on more traditional timers, like the RCBS trimpro, which grip the base on of the case. The case holders on the Wilson trimmer balance on the rails of the trimmer between the cutter and support the case so that it makes contact with the cutter on one end and the stop screw on the other. Eliminating case rim as a contact point keeps the case length more consistent.

20131017-210059.jpg

Set up and use is fairly simple. Adjusting the stop screw changes the case length and there is a set screw to lock the stop screw.


20131017-210249.jpg

To use it.

– Inset a case into your case holder
– Tap it in on a hard surface to secure the case
– Place the case holder on the rails
– Push the cutter against the case
– Keep your hand on the case holder keeping the base firmly against the stop screw
– Run or spin the trimmer while gently rotating the case holder on the rails.
– Stop when you hear/feel the case no longer being trimmed
– Tap the case out of the holder and repeat.

I have the drill attachment for mine and I mount it in the jaws of my vice. This set up is pretty handy for me but there are several different accessories to chose from.

20131017-210447.jpg

Review:

I love this trimmer. Compared to the other timers I’ve tried this is far easier to set up and more consistent. I easily get less than .001 variation. It is solid once it is so there is no “drifting” like I experienced with other trimmers, so there is no second guessing. It’s so consistent that I am comfortable only measuring every 10 cases or so. I’ve never found one off more than .001.

There are only two minor “cautions” I have for this trimmer. First, be careful when holding the case holder if you let it jump the rails you can mess up the case or worse cut yourself on the cutting head, so pay attention. Second and this is really minor, keep it out of the humidity it will get surface rust quickly, I keep mine in a ziplock bag and spray it with CLP when I am done.

Bottom line it’s a constant well made tool which makes a tedious process a bit more enjoyable.

A quick video on how to use this trimer

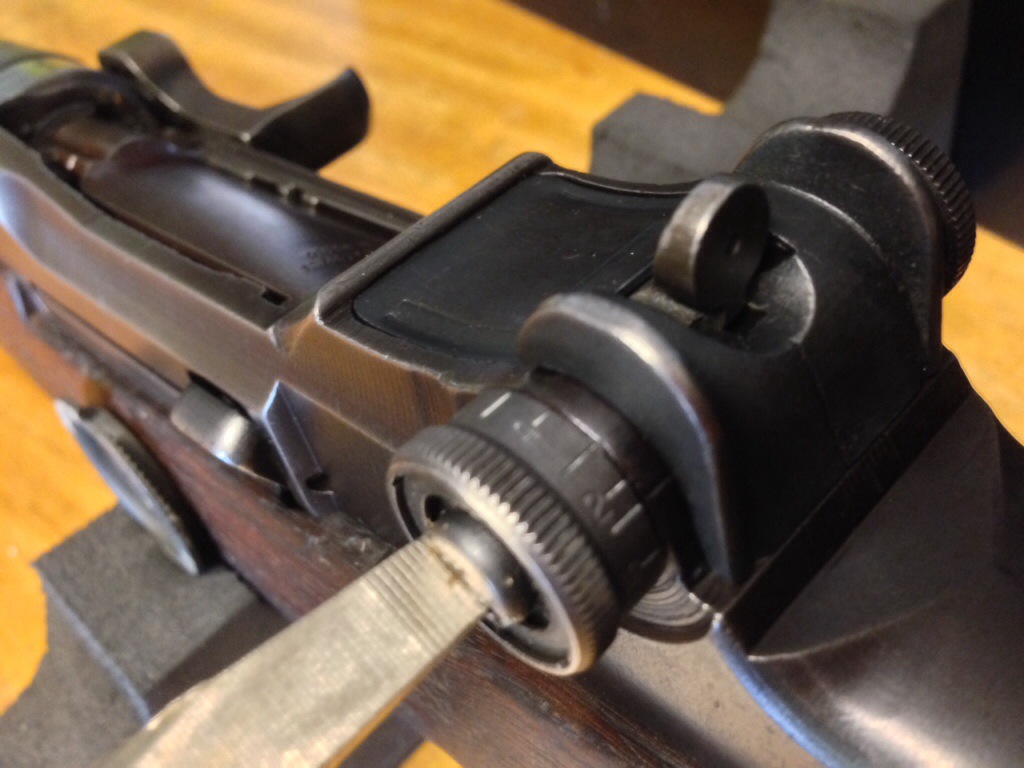
Setting The Elevation Knob On A M1 Garand

There are a few different ways to set the elevation knob on a Garand floating around. Before setting this you will first need to determine what the correct amount of clicks is for your rifle to hit the X ring.

This is how I do it:

1. Run the rear sight all the way down.
2. Loosen the elevation knob screw.
3. Continue turning the knob down until you reach your desired hashmark.
4. Continue turning the knob down counting to your desired number of clicks.
5. Tighten the elevation screw without moving the knob.
6. Turn the knob up verifying that when you have reached the number of clicks you were looking for it stops at the desired hashmark.
7. Run the rear sight all the way up and tighten the elevation knob screw all the way.
8. Return the sight to zero and go shoot in a local match.

A fair amount of competitors don’t bother with this and just count clicks. It can be a useful practice as it helps you verify at a glance you are at the right elevation. However, on the other hand, I have had the rear sight loosen up on me and cause the elevation to appear correct but the number of clicks had drifted. Best practice is probably “trust but verify” and set your your elevation knob to the right hashmark but verify from time to time, at least before each match. It is also a good idea to write your elevation and windage down on a card and place it in your stock.

20131013-210612.jpg

Fall Match at York Rifleman

I took a trip back to York Rifleman for their fall Garand Match. They shoot a full 200 yard match with pits. It’s a very well run match, I very much enjoy shooting with these folks.

The weather was perfect for shooting even if it was a little warm for October (high of 86) otherwise a light wind from behind and sunny.

I worked the pits first as I have for the past few matches with pits.

20131006-200941.jpg

I’m ashamed to confess I pulled one too soon in my haste to provide speedy service. Lucky for us our shooter didn’t fire while we pulled and we got it right back up. It’s important to wait for a call if you can’t see the shot.

I shot first after the pit change.

20131006-201248.jpg

I felt great in slow prone and did fairly well 92/2x I did OK in rapid prone 74 I jerked to the right a little. But oh boy did I screw up in rapid pone, misses and 6s all over the place.

My scorer suggested I work on shooting at my natural respiratory pause with dry fire. This was good advice. I’ve stuck some white pasters with black dots around my office and I’ll work on my natural pause. I’m in decent shape for the prone stages and my Winchester is performing well. All and all this isn’t a bad place to be.

20131006-205424.jpg

York shoots a spring match I’ll be back for sure. Except for Camp Perry this is my favorite match to shoot.

September ’13 Garand Match

I only made it out for the Garand match this month, a cold kept me home from the Service Rifle match. It was beautiful, sunny and in the mid 60’s for the first relay. The fall sun made for some challenging conditions. There was an significant glare off my rifle, it was a challenge to keep on target. There was a an abnormal amount of smoke on the range as well.

20130930-200429.jpg

Factoring the conditions I was happy with my performance, I dropped a 5 in rapid prone and a miss in off hand but I went home satisfied.

As far as the conditions go, I my opinion it’s just part of the game, sometimes it rains, sometimes it’s hot, cold, sunny, dark. I think these conditions underscore the need for a good natural point of aim. With a good NPOA it’s easier to keep rounds on target even if seeing the target is a challenging.

Replace Clip Latch Spring on a M1 Garand

The clip in one of my Garands was ejecting too soon. While this can be a byproduct of Greek clips, it’s easier to just replace the spring. Replacing this should clear up any premature ejection issues.

20130921-195250.jpg

It’s a pretty simple operation. Take the trigger assembly out and remove the lower stock. I use a heavy duty clip latch spring from Brownells.

20130921-195815.jpg

Use either a small punch or a M1 Garand combo tool to start pushing out the clip latch pin. It shouldn’t require much force to get it started.

20130921-200921.jpg


Once there is enough of the pin sticking out pull it out the rest of the way by hand. There may be a little spring tension here so be careful nothing goes flying.

20130921-201420.jpg

Then remove the existing spring from the clip latch and replace it with the new spring. The “fat” end of the spring should snap into the clip latch.

20130921-201624.jpg

Then replace the clip latch and replace the pin.

20130921-201918.jpg

Push down on clip latch and push in the clip latch pin.

20130921-202018.jpg

You can do this without totally field stripping your rifle just make sure the op rod catch is in the down position and the action is closed. Otherwise it will be difficult to reinsert the clip latch. Of course make extra sure your rifle is clear before attempting any of this.

20130921-203014.jpg