Leveraging the Laws of Thermodynamics to Remove a Stuck Barrel Nut

I picked up a nice free float rail from ALG defense, so I needed to take the barrel off of my Palmetto State Armory (PSA) mock dissipator. Sounds easy right? Well not so much. Using my improvised upper clamshell and multi-tool I couldn’t even budge it. I managed to lift my workbench slightly off of floor in the process. This was pretty impressive as my workbench is a couple hundred pounds and screwed to studs in two walls.

The front sight was canted so I knew it was probably over torqued but it was worse than I expected.

After a few more tries and a can of liquid wrench, I gave up and ordered a torque bar and a heavy long handled PRI barrel wrench.

20141002-204711-74831340.jpg

http://www.brownells.com/gunsmith-tools-supplies/rifle-tools/barrel-tools/ar-15-m16-308-ar-barrel-extension-torque-tools-prod27452.aspx

http://www.brownells.com/gunsmith-tools-supplies/rifle-tools/wrenches/ar-15-m16-ar-10-barrel-nut-wrench-prod27412.aspx

Even with the new tools ,the barrel nut wouldn’t budge. Before I broke out the saw I thought I’d give a trick I read about a try. Science suggests steel (the barrel nut) contracts less than aluminum (the receiver) when frozen. So I tossed the whole upper in the freezer overnight with the jäger and my wife’s homemade Popsicles.

20141002-205954-75594420.jpg

20141002-205955-75595317.jpg

Luckily that was just enough to break the nut free and was able to move on to installing my ALG rail, which was much easier.

20141002-210159-75719591.jpg

If I were to do it again I would have ordered the more expensive geissele reaction rod as it has nice flats built into it. The flats would make it a little easier to work with.

20141002-210800-76080055.jpg

Co-Witness: Absolute or Lower 1/3


The internet is full of speculation as to what the “best” co-witness is for your red dot and iron sights.  Frankly there is no right answer, you have to decide what works best for what you are trying to do with your rifle.

First of all what is co-witness? Sights should always be co-witnessed, which means that the iron sights and the dot are zeroed at the same distance. Zero the irons, zero the dot  and they should both point at the same place. The decision point is in determining if you prefer Absolute Co-witness or Lower 1/3. The choice really comes down to what optic mount height you chose,  the irons will stay the same height.

Lower 1/3 Co-witness is just like it sounds, the iron sights (specifically the front sight) will be in the lower 1/3 of the optic. The idea behind this is the shooter can look over or flip down the rear sight and have a “less cluttered view” but, more on that later.


20140912-210824-76104174.jpg

Absolute Co-Witness means the front sight is in the middle of the optic. The idea here is cheek weld is the same for both sighting methods. This is the method I prefer. As you can see below it is not as cluttered as some suggest.

20140912-210825-76105348.jpg


I’ve gone a step further than most with absolute co-witness.  As I am a believer in marksmanship with iron sights, I use a fixed rear sight in conjunction with an Aimpoint T1. I’m not a tactical trainer, but I like being able to keep my head in the same place to use both.

The LMT rear sight allows me to use the irons to shoot known distances using the elevation knob and the red dot allows me to acquire targets faster and shoot from weird positions. Best of both worlds in my humble opinion.

There are some things the shooter will need to “be smart” about with this set up.

1. For taking quick shot, use the dot. Don’t try and line up the irons.

2. Focus on the target if using the dot, focus on the front sight if using the irons.

3. Use the 0-2 aperture once the zero has been established, the smaller aperture is too slow for quick target acquisition. If there is time to dial in a known distance, there is time to flip the aperture to the small side.


20140912-210826-76106237.jpg

Larue Tactical offers two very nice Aimpoint Micro mounts: the LT751 (absolute) and LT660 (lower 1/3). Both are solid mounts and they have a nice quick detach leaver and repeatable zero. See the mounts here.

They have an interesting picture that they use to try to make the case that with an absolute co-witness, part of the target will be blocked.  Compared to the pictures above I’m not sure that is an honest description. The eye should be close enough to the rear sight that it is almost entirely blurred out especially with the 0-2 aperture. Even with the shooters’ head all the way at the rear of the stock, the sight will not block the target as pictured below.

In my opinion, it all boils down to the user knowing when to line up the irons and when to rely on the red dot.


Picture linked from this thread http://beta.ar15.com/archive/topic.html?b=3&f=18&t=542595

Small Arms Firing School at Camp Perry 2014

This year at Camp Perry, I attended Small Arms Firing School (SAFS). I’ve been working on off hand but I have been in desperate need of some more coaching so this was a perfect opportunity for me.

It’s a three day event. Well, sort of, the first day is just registration. There is only one registration day for SAFS and there are no same day registrations. Since there were almost 500 folks in SAFS the welcome center was busy when I rolled in around 10, after a leisurely breakfast, so get there early.

20140720-190449.jpg

20140720-190746.jpg

It took me around 2 hours to get all the way processed and buy some t-shirts at the CMP store.

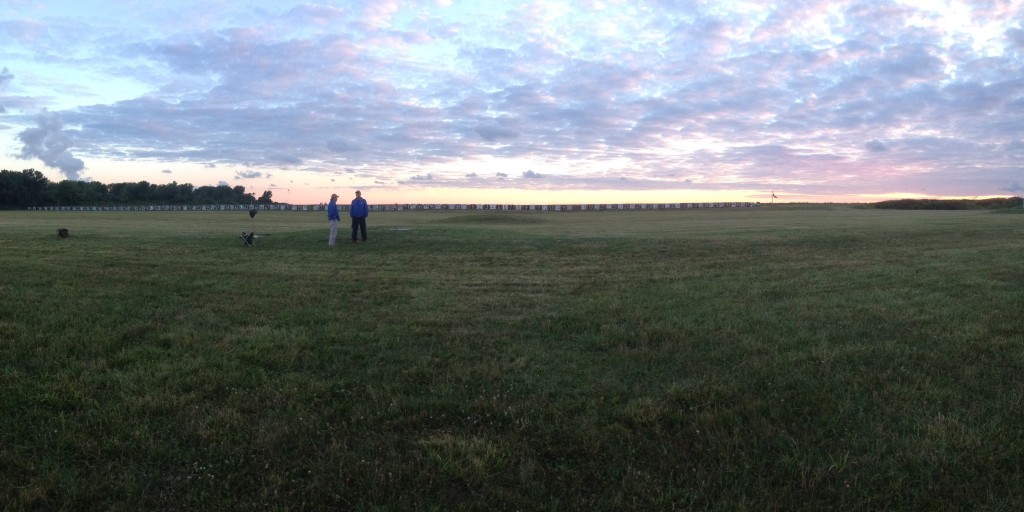
Day two starts at the theater at 7. It was an unusually crisp morning for High Power week at Camp Perry.

20140720-191336.jpg

After some  review of the features of the M16, line and pit commands the USAMU went over some basics of marksmanship. I took several pages of notes it was good stuff.

20140720-192245.jpg

At this point the class broke into 2 groups “beginner” and “advanced” the advanced group stayed in the theater for more classroom instruction i left with the beginner class. We gathered our stuff and took the long walk down Viale to the 200 yard assembly line. There was time to gather my gear from my truck which I had parked near Rodriguez, however there were some folks that had trouble getting to the line in time after retrieving their gear from the barracks. I would recommend either covering and parking your stuff outside the theater or, keeping it in your vehicle between the theater and Viale.

image

Once on the line, we were broken up into firing points and every 2 firing points had a coach. We then spent a couple hours dry firing, working on our positions and generally getting advice from our coach. I got a lot of value out of this, and I made some changes to my off hand position so I feel a bit more stable.

20140720-193903.jpg

Some time around noon the rest of the group joined us and we went into live fire practice. Just like a “regular” match we broke up into 4 relays two of us went to the pits 2 stayed to shoot and score. I went to the pits first.

20140720-194207.jpg

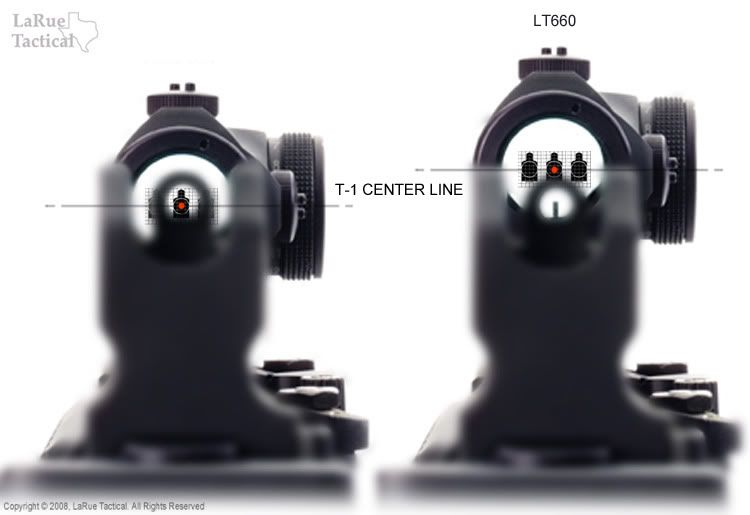
We each shot 10 rounds slow prone, 10 rapid sitting, 10 off hand. No sighters but no scores were recorded. I took this chance to try “center mass” hold which USAMU seemed to be pushing hard. My coach however preferred 6:00 hold. I decided to stick with 6:00 at least for the rest of the season.

We wrapped up around 4:30 which gave me time to spend some money on the row, again.

Day three is the “M16 EIC” match which is a proper CMP EIC match with a slightly different course of fire, 5 sighters  and 10 shots slow prone, 10 rapid prone, 10 rapid sitting, 10 off hand. all fired at 200 yards. Everyone must use the issued CMP Rock River match rifle and the issued web sling, Shooters can use their other shooting gear, coats, gloves, mags, and lucky shooting hats.

image

I must have learned something, as I beat my best pretty significantly. While I didn’t make points, a couple of guys from my club did on their first trip to Perry, which was very cool.

It was a great experience, and I learned a lot. I have been trying to remind myself to “focus on the front sight control the trigger and breath” with every shot. While pretty basic it helps. Anyone looking to improve their marksmanship regardless of skill or experience level would benefit from SAFS, I highly recommend it, I intend to keep coming back until I can make points.

image

CMMG A4 22 Upper Range Report

A couple months back I picked up a CMMG A4 22 upper. I had backordered it and frankly I had not expected it to come so soon and I was thinking about canceling it and getting an air rifle upper instead. I’m glad I didn’t!

20130819-214312.jpg

I hope to use it to get more practice for Highpower. I use the same lower as I do on my service rifle, so it has the same feel and Geissele trigger. Additionally, I use the same Turner 1907 sling, black dog magazines and topped off with a Rock River NM carry handle. While perhaps a little extravagant for a 22 upper but I wanted a good quality hooded sight that would feel the same as my White Oak A2.

It worked well, I ran out of daylight before I could get it in the black however I am happy with its performance. It fed and shot well, especially for 20+ year old 22 that’s been in the back of my gun safe as long as I can remember.

20130819-215031.jpg

20130819-215141.jpg

First NRA Highpower Service Rifle match

I’ve been shooting CMP games matches for some time now and I finally worked up the courage to shoot a NRA Highpower match with my White Oak AR15A2

20130527-183931.jpg

It was a great day for shooting mid-60s and sunny, a little windy but the berms kept that from being an issue at 100 yards.

It was a 4 stage 60 round 100 yard reduced walk and paste match with 2 sighters in each position.

1. Slow fire off hand 2 minutes for 2 sighters in the “lower” target 20 minutes for 10 in the right and 10 in the left targets

Walk… Score… Paste

2. Rapid sitting 2 minutes for 2 sighters single feed then 60 seconds for 10 rounds loaded 2 and 83

3. Rapid Prone 2 minutes for 2 sighters single feed then 60 seconds for 10 rounds loaded 2 and 83

Walk… Score… Paste

4. Slow fire prone 2 minutes for 2 sighters in the “lower” target 20 minutes for 10 in the right and 10 in the left targets.

I did “ok” for a first match, 71% but most importantly, I learned a few important things. Having preloaded magazines was very helpful next time I will be more constant with where I place them so when I grab one the bullets are froward when I try to change mags.

I really struggle with single loading prone, I am going to try on of those “bob sled” mags next time. I got in a nice rhythm after the first 10 rounds by keeping the rifle in my shoulder and just rocking to the left to drop the round in the chamber. I also reached through the carry handle instead of trying to reach over it per the advice of another shooter.

For off hand I had dry fire practiced, with the mag resting in the palm of my support hand. This turned out to be horrible, because it messed with the bolt locking to the rear and I had to charge it every time. After awhile I switched to my hand to on the D-ring which tool some shift in position but worked better in the long run. Also my 30 cal shell holder for my shooting jacket is a pain for .223 it’s hard for my fat fingers to fish the little rounds out.

I will definitely be back again, at least as long I can scrounge up ammo!

20130527-192815.jpg